When it comes to video editing, having a well-optimized computer is crucial to ensure smooth workflow and efficient processing of your footage. Mac computers are known for their reliability and performance, making them a popular choice among video editors. However, there are several steps you can take to optimize your Mac specifically for video editing, maximizing its potential, and enhancing your overall editing experience.
In this article, we will discuss hardware considerations, operating system and software optimization, performance enhancements, color management, and calibration, as well as cooling and maintenance tips to help you optimize your Mac specifically for video editing. So, without any further delay, let’s get started!
Hardware Considerations for Video Editing on Mac
When it comes to video editing on a Mac, having the right hardware configuration is crucial to ensure smooth and efficient performance. Here are the key hardware considerations to keep in mind for video editing on a Mac:
Processor (CPU): A powerful processor is essential for video editing tasks, as it handles the bulk of the computational workload. For Mac users, look for models with Apple Silicon-based chips M2 Pro or M2 Max processors. Multiple cores and high clock speeds are advantageous for rendering, transcoding, and real-time playback.
RAM (Memory): Having ample RAM is crucial for video editing, especially when working with large, high-resolution files. For smooth performance, aim for at least 16GB of RAM, but if your budget allows, consider upgrading to 32GB or more for more demanding projects and multitasking.
Graphics Card (GPU): However, a dedicated graphics card can significantly improve video editing performance, especially during rendering and playback. But, Apple’s latest M2 series arrives with powerful integrated GPUs with up to 20 cores, which are more than enough to handle any video editing tasks efficiently. This will help accelerate effects processing, video playback, and GPU-accelerated tasks in your video editing software.
Storage Options: Fast and ample storage is essential for video editing projects. For your Mac, consider models with SSD (Solid State Drive) storage, as they offer faster read/write speeds compared to traditional hard drives (HDDs). SSDs ensure quicker file access, faster project loading times, and smoother scrubbing in the timeline.
Display and Calibration: A high-quality, color-accurate display is crucial for video editing. Look for Mac models with Retina displays or consider investing in an external professional-grade monitor with accurate color reproduction. Regularly calibrate your monitor using hardware or software calibration tools to ensure consistent color representation throughout your editing process.
Connectivity & Battery Life: Ensure that your Mac has sufficient ports and connectivity options to accommodate your peripherals and external devices. Having multiple Thunderbolt or USB-C ports will be beneficial for connecting external drives, video capture devices, and other accessories. If you plan to do video editing on a MacBook, consider a model with good battery life to support extended editing sessions on the go. Keep in mind that video editing is resource-intensive, and it’s beneficial to have a charger available for power-hungry tasks.
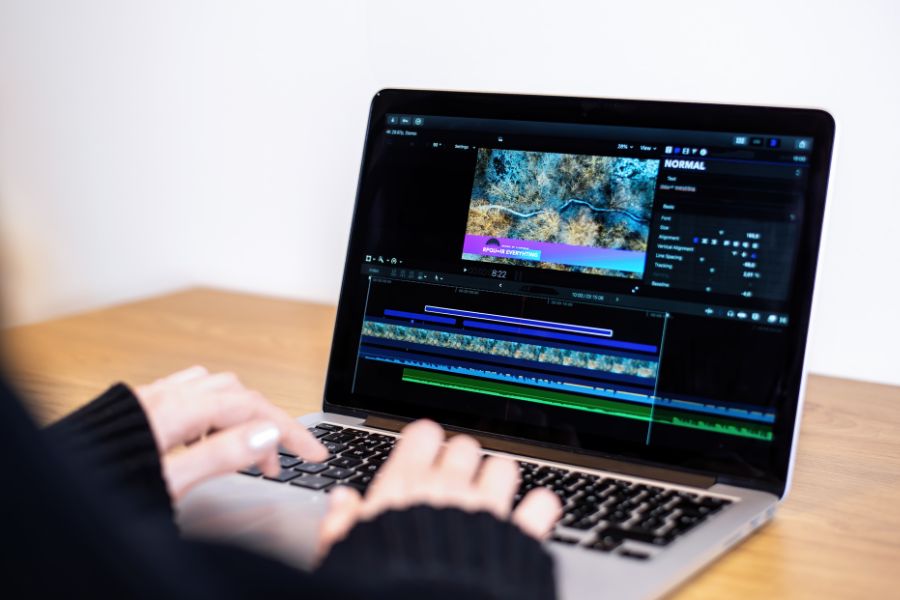
How to Optimize Your Mac for Video Editing?
Let’s check out some important steps to optimize your Mac device for video editing!
Operating System Optimization
Regularly updating your macOS system to the latest version available is essential. Updates often include performance improvements, bug fixes, and security enhancements that can positively impact video editing software. To update your macOS, follow these steps:
- Click on the Apple menu in the top-left corner of the screen.
- Select “System Preferences” from the dropdown menu.
- Click on “Software Update” and follow the instructions to update your macOS.
Moreover, disable any sleep or energy-saving settings that could potentially interrupt your video editing sessions. Adjust these settings to keep your Mac awake and prevent it from going into sleep mode during critical tasks. Adjust these settings to keep your Mac awake and prevent it from going into sleep mode during critical tasks. Remove unnecessary applications from the startup list to reduce system resource consumption and improve boot times.
Optimize Disk Space
Managing your disk space efficiently is essential for optimal video editing performance. Follow these tips to optimize disk space on your Mac:
- Keep at least 20% of your Mac’s internal storage free for efficient system operation.
- Regularly clean up unused files and applications to free up disk space. Use tools like CleanMyMac or Disk Cleanup to identify and remove unnecessary files.
Close Unnecessary Applications
Closing any unnecessary applications and background processes running on your Mac can significantly improve video editing performance. These applications consume system resources and may impact the performance of your video editing software. To close unnecessary applications:
- Click on the application you want to close.
- Go to the application menu in the top-left corner of the screen.
- Select “Quit” or press Command + Q.
Adjust Energy Saver Settings
Configuring the energy-saving settings can prevent interruptions during video editing tasks. Follow these steps to adjust the energy saver settings on your Mac:
- Click on the Apple menu in the top-left corner of the screen.
- Select “System Preferences” from the dropdown menu.
- Click on “Energy Saver.”
- Check the box that says “Prevent computer from sleeping automatically when the display is off” to ensure uninterrupted video editing.
- Set the “Turn display off after” option to a reasonable duration to save power when idle.
Configure Display Settings
Properly configuring your display settings can enhance the video editing experience. Follow these steps to optimize display settings on your Mac:
- Calibrate your monitor to ensure accurate colors during video editing. Use the built-in Display Calibrator Assistant in System Preferences > Displays > Color.
- Use an external monitor with a higher resolution for additional screen real estate and enhanced editing experience.
- Adjust the display resolution to match the native resolution of your monitor for sharper and more accurate visuals. To change the display resolution:
- Click on the Apple menu in the top-left corner of the screen.
- Select “System Preferences” from the dropdown menu.
- Click on “Displays.”
- Select the “Display” tab and choose the appropriate resolution.
Optimize Video Editing Software
Each video editing software has its own set of preferences that can be adjusted for optimal performance. Here are some general tips to optimize video editing software:
- Keep your video editing software up to date to benefit from performance enhancements and bug fixes.
- Configure the software’s preferences for optimal performance. This includes adjusting cache settings, playback quality, and render settings. Consult the software’s documentation or support resources for specific optimization options.
Use Proxies or Optimized Media
Working with high-resolution videos can be resource-intensive. To improve editing performance, consider using proxies or optimized media files. Proxies are lower-resolution versions of your footage that are easier to edit. You can switch to the original files during the final export. To work with proxies:
- Import your footage into the video editing software.
- Create proxies by selecting the appropriate option in the software’s settings or preferences menu.
- Use the proxies for editing, and switch to the original files for final export.
Utilize Multiple Hard Drives
Using separate drives for different purposes can help distribute the load and prevent performance bottlenecks. Consider the following setup:
- System Drive: Use a fast SSD as the primary drive for the macOS system and applications.
- Media Drive: Store your video files on a separate drive or external storage. This allows for faster read/write speeds and improves video editing performance.
- Project Drive: Use a dedicated drive for storing project files to prevent slowdowns when working with multiple projects simultaneously.
- Cache Drive: Configure your video editing software to use a separate SSD for storing cache files. This can significantly improve performance when working with effects, transitions, and color grading.
Disable FileVault
FileVault is a built-in disk encryption feature in macOS. While it provides security benefits, it can slightly impact disk read/write speeds, affecting video editing performance. If you’re not concerned about security or have alternative security measures in place, disabling FileVault can be considered. To disable FileVault:
- Click on the Apple menu in the top-left corner of the screen.
- Select “System Preferences” from the dropdown menu.
- Click on “Security & Privacy.”
- Select the “FileVault” tab.
- Click on the lock icon in the bottom-left corner and enter your administrator password.
- Click on the “Turn Off FileVault” button.
Enable GPU Acceleration
Check if your video editing software supports GPU (Graphics Processing Unit) acceleration. GPU acceleration offloads processing tasks to the graphics card, resulting in faster rendering and exporting. To enable GPU acceleration:
- Open your video editing software.
- Go to the software’s preferences or settings menu.
- Look for an option related to GPU acceleration or hardware acceleration.
- Enable the option if available.
Adjust System Performance
Fine-tuning certain system settings can optimize overall performance. Follow these steps to adjust system performance settings:
- Open System Preferences > Dock & Menu Bar.
- Reduce motion by unchecking the option to reduce visual effects. This can improve overall system performance.
- Open System Preferences > Accessibility > Display.
- Uncheck “Reduce motion” to optimize interface smoothness.
Manage Background Processes
Some background processes may consume system resources and impact video editing performance. To manage background processes:
- Open the Activity Monitor application located in the Applications > Utilities folder.
- Click on the “CPU” tab to sort processes by CPU usage.
- Identify processes that are using a significant amount of CPU resources but are not essential for video editing.
- Select the process and click on the “X” button in the top-left corner to quit the process.
Disable Automatic App Updates
Automatic updates for applications can consume system resources and hinder video editing performance. To disable automatic app updates:
- Open the App Store application on your Mac.
- Go to the “App Store” menu in the menu bar.
- Select “Preferences.”
- Uncheck the option for automatic updates.
Optimize External Devices
If you’re using external devices such as hard drives or peripherals, optimizing their performance can improve video editing efficiency. Consider the following tips:
- Use high-speed Thunderbolt or USB 3.0 connections for external storage devices to ensure fast data transfer rates.
- Format external drives using a file system optimized for macOS, such as APFS (Apple File System).
- Keep external devices connected directly to your Mac rather than using daisy-chained connections or hubs, as these can introduce latency or reduce data transfer speeds.
Regular Maintenance
Perform regular maintenance tasks to keep your macOS system running smoothly:
- Keep your macOS and video editing software updated.
- Run disk utility software to repair disk permissions and optimize file storage.
- Clear temporary files, caches, and unused media from your system regularly.
- Restart your Mac periodically to free up system resources.
How Optimizing Impacts the Video Editing Experience?
Optimizing your Mac before video editing is essential to ensure a smooth and efficient editing process. Here are the key reasons why optimizing your Mac is important:
Enhanced Performance
Video editing is a resource-intensive task that requires significant processing power, memory, and storage. By optimizing your Mac, you can maximize its performance capabilities, enabling faster rendering, smoother playback, and efficient editing workflows. Optimization techniques such as adjusting system settings, managing background processes, and allocating more RAM to your editing software can significantly improve performance and reduce processing time.
Smooth Playback
Video editing often involves working with high-resolution video files and complex effects. If your Mac is not optimized, you may experience laggy or choppy playback, making it difficult to accurately preview your edits. Optimization techniques like utilizing external SSDs, increasing RAM allocation, and monitoring system resources can help ensure smooth playback, allowing you to make precise adjustments and achieve the desired visual results.
Faster Rendering
Rendering is a time-consuming process in video editing, especially for complex projects or high-resolution footage. By optimizing your Mac, you can speed up the rendering process and reduce the time it takes to export your final video. Optimization techniques such as utilizing external SSDs for faster read/write speeds, allocating more RAM, and managing system resources can significantly improve rendering performance, saving you valuable time.
Efficient Workflow
Video editing involves multiple tasks, including importing, organizing, editing, and exporting footage. An optimized Mac ensures a streamlined workflow, allowing you to work efficiently without unnecessary delays or interruptions. By optimizing your Mac’s hardware, operating system settings, and video editing software preferences, you can create a smooth and efficient workflow, enabling you to focus on your creativity and produce high-quality videos.
Color Accuracy
Accurate color representation is crucial in video editing. An unoptimized Mac may display colors differently, leading to inconsistencies between your editing environment and the final output. By optimizing your Mac’s display calibration, color profiles, and color management settings, you can ensure accurate color representation throughout your editing process. This ensures that your videos look consistent and professional across different devices and viewing platforms.
Stability and Reliability
An optimized Mac is more stable and reliable during video editing tasks. It reduces the likelihood of crashes, freezes, or unexpected errors that can disrupt your editing process and potentially lead to data loss. By keeping your Mac updated, managing system resources, and performing regular maintenance, you can enhance the stability and reliability of your system, providing a seamless editing experience.
Frequently Asked Questions (FAQs)
Why should I optimize my Mac for video editing?
Optimizing your Mac for video editing is important to ensure smooth performance, efficient workflow, and high-quality results. By optimizing your Mac’s hardware, operating system settings, video editing software, and implementing performance enhancements, you can enhance rendering speeds, improve playback quality, and have a more efficient editing experience.
What are the key hardware considerations for video editing on a Mac?
Important hardware considerations include having a powerful processor, ample RAM (memory), a dedicated graphics card, and fast storage options such as SSDs. Additionally, using a color-accurate display and calibrating it regularly are crucial for accurate color representation in video editing.
What software optimizations should I consider for video editing on my Mac?
Choose the right video editing software that suits your needs and adjust its preferences and settings for optimal performance. Additionally, optimizing your workflow by using keyboard shortcuts, organizing media efficiently, and utilizing proxy media can enhance your editing experience.
What are some performance enhancements I can implement for video editing on my Mac?
To enhance performance, you can clean up your hard drive by deleting unnecessary files, manage background processes by closing or disabling unnecessary applications, utilize external SSDs for storing video files, increase RAM allocation if possible, and monitor your system resources using Activity Monitor.
Should I perform regular maintenance on my Mac for video editing?
Yes, regular maintenance is important for optimal performance. This includes cleaning dust from your Mac’s vents and fans to prevent overheating, updating software, firmware, and drivers for compatibility, and periodically performing maintenance tasks to keep your Mac running smoothly.
How important is color management and calibration in video editing on a Mac?
Color management and calibration are crucial for accurate color representation in video editing. Regularly calibrating your monitor using hardware or software calibration tools and utilizing appropriate color profiles in your video editing software ensure consistent and accurate color grading and representation.
The Verdict
In conclusion, optimizing your Mac before video editing is crucial to achieving enhanced performance, smooth playback, faster rendering, efficient workflows, accurate color representation, and a stable editing environment. By implementing the necessary optimizations, you can unlock the full potential of your Mac, allowing you to focus on your creative vision and produce high-quality videos with ease.
Remember that each optimization technique is important in its own way, and a combination of these strategies will help you achieve the best results. With an optimized macOS system, you can focus on your creativity and produce professional-quality videos with ease. What are your thoughts? Please do let’s know in below comment section!


