Today, I’m talking about three ways to take a screenshot on Mac: a keyboard shortcut, a built-in utility, and third-party applications.
Apple computers may surprise beginners by not having a PrintScreen button like Windows-based PCs. However, of course, you can take screenshots on Mac.
As a rule, all actions are made much easier on the OS from Apple. But in the case of such an operation as taking screenshots, for some reason, everything is much more complicated in macOS. However, instead of the missing separate button for screenshots, macOS provides several options for solving the problem.
You can use several keyboard shortcuts that will give different effects. Run the built-in utility, which will allow you more freedom in creating an image and recording a video and freeing up your memory from key combinations. Or apply a totally radical way: use a third-party, free application.
Take a screenshot on Mac.
Unlike other operating systems, on Mac, you can take a screenshot of the entire screen. But also of a separate part of it. I will tell you what hotkey combinations you need to know and what programs you can use to work with screenshots of the screen of Apple computers and laptops.
Keyboard shortcut
There are two keyboard shortcuts that perform different tasks.
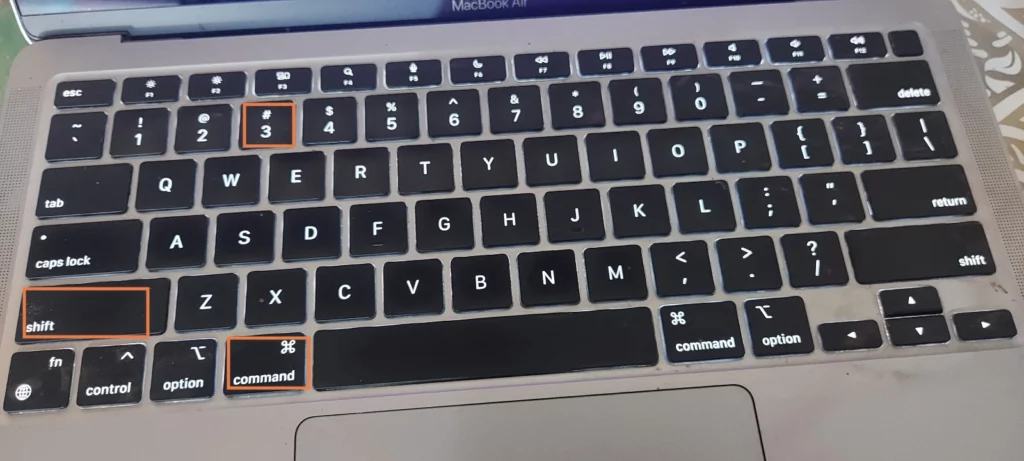
If you use the combination Shift + Command + 3, you will get a screenshot of the entire screen area. With this, when you take a picture, a thumbnail of the image will appear in the corner. If you want to edit it, just click on the preview. And if not, then wait until the screenshot is saved to the desktop.
If you use the combination Shift + Command + 4, you will see a crosshair on the monitor. Drag it with the touchpad or mouse over the required area of the screen. When you release the touchpad or mouse, the screenshot will be saved to the desktop.
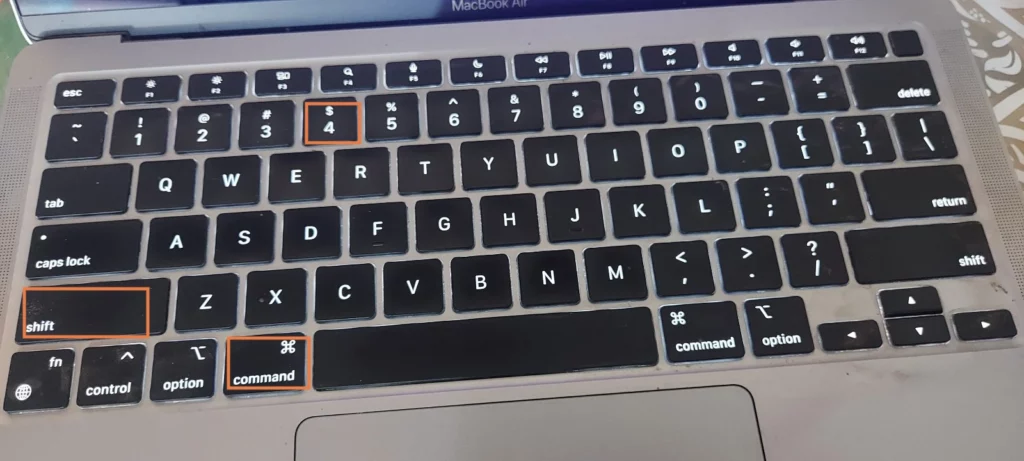
Few people know, but if you press Shift + Command + 4 + space, then instead of the cursor, you will see a camera icon. By directing it to the window of an open program, you can take a picture of a specific window by pointing the icon to the toolbar – a screenshot of the toolbar and so on. This feature is useful when the desktop is littered with open windows that prevent you from taking a neat screenshot.
If you want to save the screenshot to the clipboard, hold the Control key. Ready! You can send a picture by pasting it into a conversation.
It is significant to know that some programs do not allow you to take screenshots, such as Apple TV.
Where are screenshots saved on a Mac?
Optionally, Mac screenshots are saved to the desktop. But if you often take screenshots, there will be so many pictures that the desktop will simply be crammed with files. To avoid this situation, you can change the location where the screenshot is stored. To do this, you must have macOS Mojave or later. Create a folder where you plan to save pictures, then go to the “Screenshot” – “Options” program and select the desired folder there.
Built-in utility from Apple
It is called “Screenshot” and allows you not only to take screenshots but also to capture a video of the entire display or a selected area.
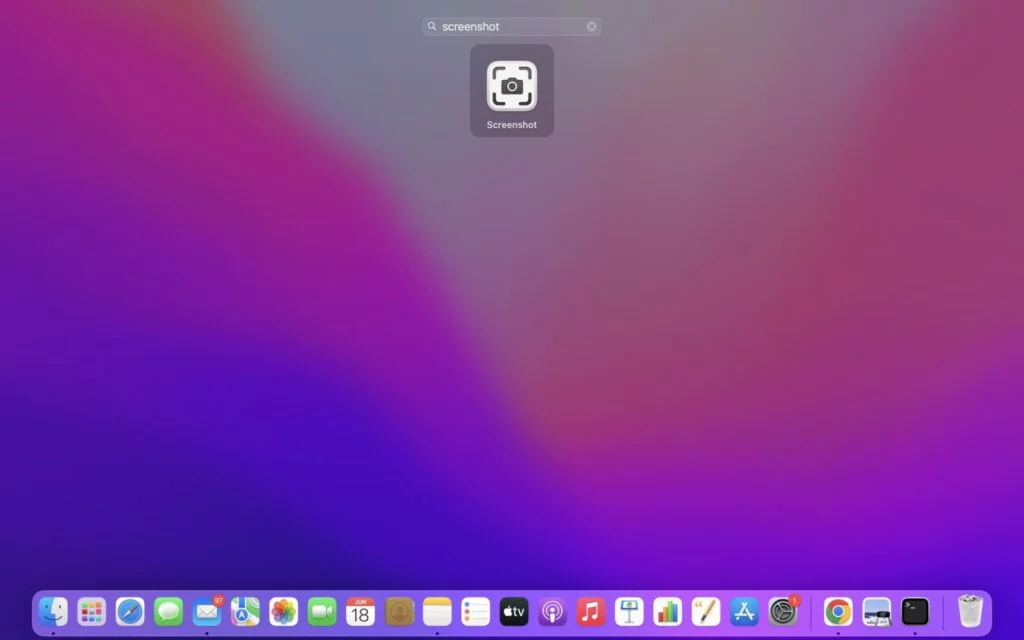
To find the utility, open the Dock and type “Screenshot” in the search box. After launching the application, you will see a panel with controls. On it, you can select an object for taking a screenshot, as in the case of a keyboard shortcut, set a timer, save screenshots and videos on your computer, and much more.
Third-Party Applications
There are many screenshots and image editing software available in the app store. There are both paid and free options, but I have chosen two of the best and, at the same time, completely free.
For those who do not like to figure it out for a long time, Skitch is suitable – the software is available in the App Store. It allows you to not only take screenshots but also edit them. Editing tools are similar to Apple’s built-in utilities, so working with the program will be familiar.
And for those who like to edit images with pixel accuracy and arrange tag clouds, the free monster Monosnap is perfect. It is a real combine, not yet as bulky and omnipotent as the famous Adobe Photoshop, but already much stronger than the built-in Apple tools.
There are no intrusive ads in the application. But there is the ability to set up your own hotkeys, a convenient editor, a magnifying glass with 8x magnification, a free cloud for storing images, and the ability to connect your own FTP / SFTP, Amazon S3, or WebDAV. Also, the software can record video from the screen and webcam.
Conclusion
Now you know how to take a screenshot on Mac, where to store it, and how to crop it. Use these life hacks to make your work on Apple devices easier. If you have anything else to ask, you can ask us in the below comment section!


![How to take screenshots on a Mac? [One Click Method]](https://geeksdigit.com/wp-content/uploads/2024/11/HOW-TO-TURN-OFF-DISPLAY-WHEN-USING-EXTERNAL-MONITOR.jpg)
![How to take screenshots on a Mac? [One Click Method]](https://geeksdigit.com/wp-content/uploads/2025/05/clean-install-nvidia-driver.jpg)
