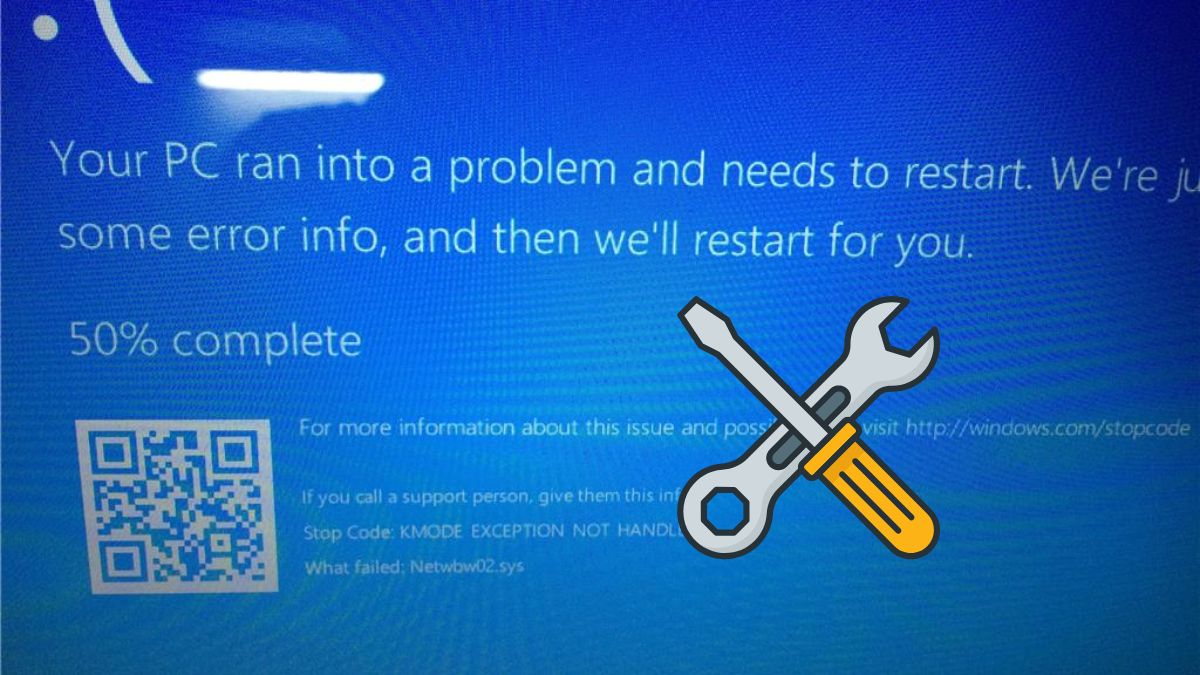
Gaming on a PC has become a popular pastime for millions of enthusiasts worldwide, offering a level of immersion and performance that surpasses most gaming consoles. However, one common and frustrating issue that many PC gamers encounter is unexpected restarts during gameplay. Nothing can be more disheartening than being in the midst of an intense gaming session, only to have your computer suddenly shut down and restart, potentially losing progress and momentum.
This comprehensive guide aims to delve into the most common causes of PC restarts during gaming and provide step-by-step troubleshooting methods to resolve these issues. From hardware failures to software conflicts, we will explore all possible culprits and help you diagnose and fix the problem, ensuring you can enjoy seamless and uninterrupted gaming experiences on your PC. Without any interruption, let’s get started!
Common Causes of PC Restarts During Gaming
There are several reasons that could make your PC restart while gaming. So, have a look into it.
Insufficient Power Supply: Adequate power supply is vital for a stable and reliable gaming experience. When playing resource-intensive games, your PC demands more power to fuel the CPU, graphics card, and other components. If your power supply is underpowered, it may struggle to keep up, leading to sudden restarts.
Overheating: Gaming generates a considerable amount of heat, particularly for your CPU and graphics card. Overheating can lead to thermal throttling or, in severe cases, an automatic shutdown to protect the components from damage.
Graphics Card Driver Issues: Outdated or corrupted graphics card drivers can lead to various performance problems, including PC restarts during gaming. Having up-to-date graphics card drivers are essential to optimal gaming performance. Outdated or malfunctioning drivers can cause your PC to restart unexpectedly.
RAM Problems: RAM plays a crucial role in gaming, as it temporarily stores game data for quick access. Faulty RAM modules can lead to system instability, resulting in unexpected restarts during gameplay.
CPU Overclocking: Overclocking the CPU can boost gaming performance, but it can also lead to instability if not done correctly. Excessive CPU overclocking halts system stability which can cause restarts during resource-intensive tasks.
Hard Drive or SSD Issues: Problems with your storage drives, whether traditional hard drives or SSDs, can impact gaming performance and cause unexpected restarts.
How to Fix PC Restarts While Gaming?
Let’s discuss troubleshooting the PC that keeps restarting while gaming.
Stress Testing and Monitoring Tools
Stress testing and monitoring tools are essential for diagnosing and evaluating the stability and performance of your PC, particularly during resource-intensive activities like gaming. These tools allow you to simulate heavy workloads, monitor system temperatures, and assess how well your computer handles the stress.
Stress Testing Tools
- Prime95: A popular CPU stress testing tool that pushes your processor to its limits, helping to identify stability issues and potential overheating problems.
- FurMark: Primarily used for stress testing graphics cards, FurMark pushes the GPU to its maximum capacity to reveal any instability or overheating concerns.
- AIDA64: This comprehensive system stability testing tool can stress test various components, including CPU, GPU, RAM, and storage drives.
Stress testing tools allow you to assess how well your PC performs under heavy loads, which is crucial for identifying potential instability issues. If your system experiences sudden restarts during gaming, stress testing can help pinpoint the problematic component, such as an overheating CPU or GPU.
Monitoring Tools
- HWMonitor: Provides real-time monitoring of CPU, GPU, and system temperatures, as well as fan speeds and voltages.
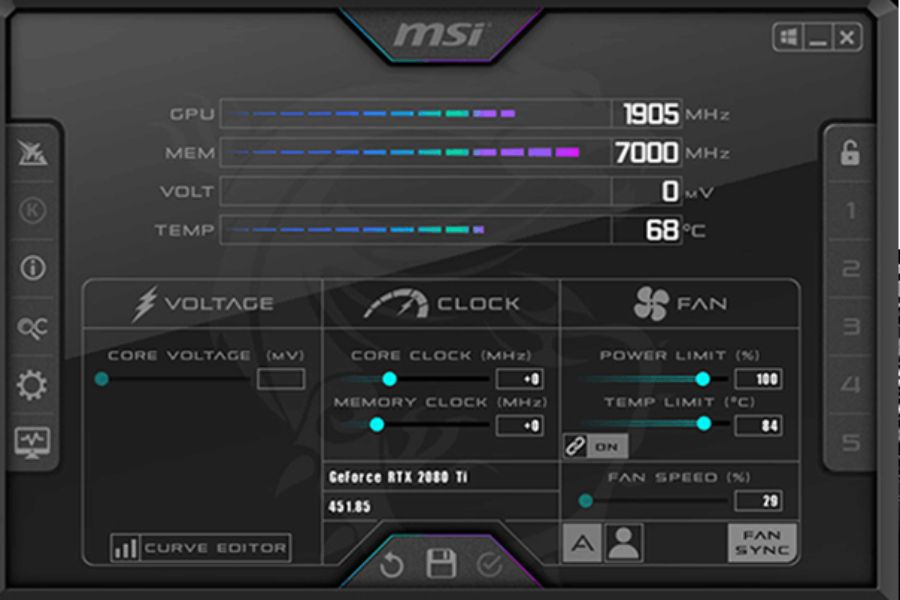
- MSI Afterburner: Originally designed for GPU overclocking, MSI Afterburner also offers detailed monitoring of GPU performance, temperature, and usage.
- Core Temp: A lightweight tool that monitors CPU temperature and provides information about individual core temperatures.
Monitoring tools complement stress testing by providing real-time data on critical system metrics. Monitoring temperatures and other parameters during gaming sessions can help you correlate system restarts with spikes in temperature or other abnormalities. By utilizing stress testing and monitoring tools, you can proactively diagnose and address hardware or cooling-related problems. This information will guide you in making informed decisions, such as upgrading cooling solutions or adjusting overclock settings to improve your PC’s stability and overall gaming experience.
Power Supply Evaluation
Evaluating your power supply (PSU) is an important step in troubleshooting PC restarts during gaming, as an insufficient or faulty PSU can cause instability and unexpected shutdowns. Assessing your PSU involves checking its wattage, performance, and compatibility with your system’s components.

Significance of Power Supply Evaluation
- Wattage Requirement: Modern gaming PCs with powerful CPUs and graphics cards demand substantial power. If your PSU’s wattage is insufficient to meet your system’s needs, it may struggle to supply the necessary power during intense gaming sessions, leading to restarts or shutdowns.
- Component Compatibility: Different graphics cards and CPUs have varying power requirements. A PSU must provide enough power and have the appropriate connectors to support all your components adequately. Incompatible connectors can result in instability and potential damage to your hardware.
- Power Efficiency: Evaluating your PSU’s efficiency is vital for optimizing power consumption and reducing electricity costs. Higher efficiency PSUs waste less energy as heat, ensuring stable power delivery to your components.
Steps to Evaluate Your Power Supply
- Identify PSU Wattage: Check the label on your PSU to find its wattage rating. If you no longer have the PSU box or label, you can open your PC case and look for the wattage information printed on the PSU itself.
- Calculate Power Requirements: Determine the total power requirements of your PC by adding up the wattage ratings of all components, including the CPU, GPU, RAM, storage drives, and additional peripherals. Make sure to account for potential future upgrades as well.
- Consider Overhead: To ensure stable power delivery and accommodate power spikes during intense gaming, it’s wise to have a PSU with a slightly higher wattage than the calculated power requirements. A 10-20% overhead is recommended.
- Check PSU Connectors: Verify that your PSU has the necessary connectors to support all your components. High-end graphics cards often require multiple PCIe connectors, and modern motherboards may need specific CPU power connectors (e.g., 8-pin or 4-pin).
- Efficiency Rating: Look for the PSU’s efficiency rating, often indicated by the 80 PLUS certification. A higher-rated PSU will be more efficient, reducing energy wastage and heat generation.
- PSU Health: Evaluate the condition of your PSU. Look for signs of physical damage, such as frayed cables or burnt smells. A malfunctioning PSU can cause a variety of issues, including PC restarts during gaming.
- Consider Upgrading: If your current PSU’s wattage is insufficient for your system’s requirements or if it lacks necessary connectors, consider upgrading to a higher-quality PSU with better performance and compatibility.
Overall, power supply evaluation is a crucial step in troubleshooting PC restarts during gaming. By checking the PSU’s wattage, compatibility, efficiency, and health, you can identify whether the PSU is the underlying cause of the restart issues.
Upgrading to a higher-wattage and reliable PSU with the appropriate connectors can ensure stable and uninterrupted power delivery to your components, improving your gaming experience and preventing unexpected shutdowns. Always prioritize safety when dealing with power supply upgrades and consider seeking professional assistance if needed.
Thermal Management
Thermal management is a critical aspect of ensuring the stable and efficient operation of your PC, particularly during gaming sessions when the components are subjected to heavy workloads and generate significant heat. Proper thermal management helps prevent overheating, which can cause system instability and unexpected restarts.
Importance of Thermal Management
- Preventing Overheating: The CPU and graphics card are two of the most heat-generating components in a gaming PC. Overheating can lead to thermal throttling, where the components reduce their performance to cool down, causing a drop in gaming performance.
- Avoiding Instability: High temperatures can cause system instability, leading to crashes, freezes, and, in extreme cases, automatic shutdowns or restarts.
- Prolonging Component Lifespan: Operating at high temperatures for prolonged periods can reduce the lifespan of your PC’s components. Proper thermal management ensures the longevity of your hardware.
Tips for Thermal Management
- Adequate Case Airflow: Ensure your PC case has proper airflow to dissipate heat efficiently. Use case fans strategically to create a smooth flow of air through the case, directing cool air to the components and expelling hot air from the case.
- Proper Cable Management: Organize your cables to improve airflow within the case. Neatly route and tie cables to prevent them from obstructing airflow and creating pockets of stagnant hot air.
- Quality Thermal Paste: Use high-quality thermal paste when installing or reseating your CPU or GPU. Thermal paste facilitates efficient heat transfer between the processor and the heatsink, optimizing cooling performance.
- Aftermarket Cooling Solutions: Consider upgrading your stock CPU and GPU coolers to aftermarket cooling solutions. Air coolers with larger heatsinks and more efficient fans, or liquid cooling solutions, can significantly improve heat dissipation.
- Monitor Temps with Software: Install temperature monitoring software to keep track of your CPU and GPU temperatures in real time. Monitoring temperatures during gaming allows you to identify potential thermal issues and take corrective measures.
- Clean Dust Regularly: Dust accumulation inside your PC can impede airflow and lead to higher temperatures. Regularly clean your PC using compressed air to remove dust from fans, heatsinks, and vents.
- Maintain Room Temperature: Ensure your gaming setup is in a well-ventilated area with a comfortable ambient temperature. High ambient temperatures can exacerbate heat-related issues inside your PC.
Thermal management is vital for the proper functioning and longevity of your gaming PC. Overheating can lead to instability and unexpected restarts during gaming sessions, impacting your overall gaming experience. By employing proper thermal management techniques such as optimizing case airflow, using quality thermal paste, considering aftermarket cooling solutions, and monitoring temperatures, you can maintain optimal operating temperatures for your PC’s components. This ensures stable performance and extends the lifespan of your hardware, allowing you to enjoy uninterrupted and immersive gaming sessions on your PC.
Graphics Card Driver Maintenance
Graphics card driver maintenance is crucial for ensuring optimal gaming performance and stability. Outdated or corrupted graphics card drivers can lead to various issues, including PC restarts during gaming. Regularly updating and maintaining your graphics card drivers is essential to prevent compatibility problems and take advantage of performance improvements offered by the latest updates.
Importance of Graphics Card Driver Maintenance
- Performance Optimization: Graphics card manufacturers regularly release driver updates to optimize performance for newly released games and improve overall graphics processing.
- Bug Fixes: Driver updates often include bug fixes that address issues reported by users, including those related to crashes or instability during gaming.
- Stability: The latest drivers can enhance system stability, reducing the likelihood of unexpected restarts or system freezes during gaming sessions.
Steps for Graphics Card Driver Maintenance
- Identify Your Graphics Card: Determine the make and model of your graphics card. You can find this information in the Device Manager or by checking the manufacturer’s website.
- Check for Driver Updates: Visit the manufacturer’s website for your graphics card, such as NVIDIA or AMD, and look for the “Drivers” or “Support” section. Enter your graphics card details to find the latest driver updates available for your specific model.
- Uninstall Old Drivers: Before installing the new drivers, it’s essential to uninstall the existing ones from your system. To do this, go to the Control Panel or use a driver uninstaller tool to remove the old drivers.
- Install New Drivers: Download the latest drivers for your graphics card and run the installer. Follow the on-screen instructions to complete the installation process. During the installation, you may be prompted to choose additional settings or perform a clean installation, which removes any residual files from previous driver versions.
- Configure Graphics Settings: After installing the new drivers, access the graphics card control panel (e.g., NVIDIA Control Panel or AMD Radeon Software) to configure the graphics settings for your games. Adjust settings such as resolution, anti-aliasing, and texture quality to achieve the desired balance between visual fidelity and performance.
- Automatic Updates: Consider enabling automatic driver updates if the option is available in your graphics card control panel. This ensures that your drivers are regularly updated with the latest improvements and bug fixes automatically.
By keeping your drivers up to date, you can take advantage of performance optimizations, bug fixes, and increased stability provided by the latest updates. Regularly check for driver updates on the manufacturer’s website, uninstall old drivers before installing new ones, and configure graphics settings to suit your gaming preferences.
With proper graphics card driver maintenance, you can ensure a smoother and more enjoyable gaming experience on your PC, while reducing the likelihood of unexpected restarts or other graphical issues during gameplay.
Memory Diagnostics
Memory diagnostics is a crucial process for identifying and resolving issues related to your PC’s RAM (Random Access Memory). Faulty RAM can lead to system instability and unexpected restarts during gaming, among other problems. Memory diagnostics tools help to test and diagnose RAM-related issues, allowing you to take appropriate corrective actions.
Importance of Memory Diagnostics
- Identifying RAM Errors: Memory diagnostics tools help detect errors in your RAM modules, such as bad sectors or faulty cells. Identifying these errors allows you to pinpoint the specific RAM module causing issues.
- Resolving Instability: Faulty RAM can result in system crashes, freezes, and restarts during gaming or other resource-intensive tasks. Fixing RAM-related problems can lead to improved system stability.
- Preventing Data Loss: In some cases, faulty RAM can lead to data corruption or loss. By identifying and resolving RAM errors, you can protect your valuable data from potential damage.
Steps for Memory Diagnostics
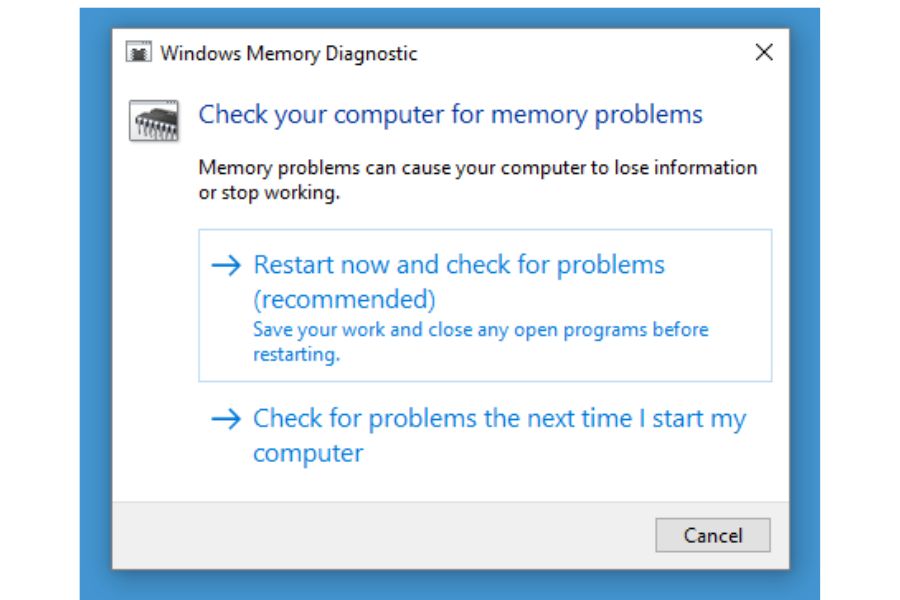
- Use Windows Memory Diagnostic Tool: Windows includes a built-in memory diagnostic tool that can help test your RAM for errors. To access this tool, press the Windows key + R to open the Run dialog box. Type “mdsched.exe” and press Enter. Your computer will prompt you to restart to check for memory problems. The memory diagnostic tool will run automatically during the restart process and perform a basic test on your RAM.
- Reseat or Replace RAM Modules: If the memory diagnostic tool detects errors, the first step is to try reseating the RAM modules. Power off your PC, open the case, and carefully remove and reinsert each RAM module one at a time. Ensure they are properly seated in their slots.
- Test Each RAM Module: If reseating the RAM does not resolve the errors, you can test each RAM module individually to determine which one is faulty. Remove all but one RAM module and run the memory diagnostic tool again. Repeat this process for each RAM module until you identify the problematic one.
- Replace Faulty RAM: Once you have identified the faulty RAM module, it’s essential to replace it with a new, compatible one. Make sure to purchase RAM with the same specifications as the existing modules for optimal compatibility.
By using memory diagnostic tools like the built-in Windows Memory Diagnostic Tool, you can identify and resolve RAM-related errors, ensuring improved system stability and preventing data loss. If reseating the RAM doesn’t fix the problem, testing each RAM module individually will help pinpoint the faulty one, allowing you to replace it with a new, compatible module. Proper memory diagnostics and maintenance will contribute to a smoother and more reliable gaming experience on your PC.
BIOS and CPU Settings
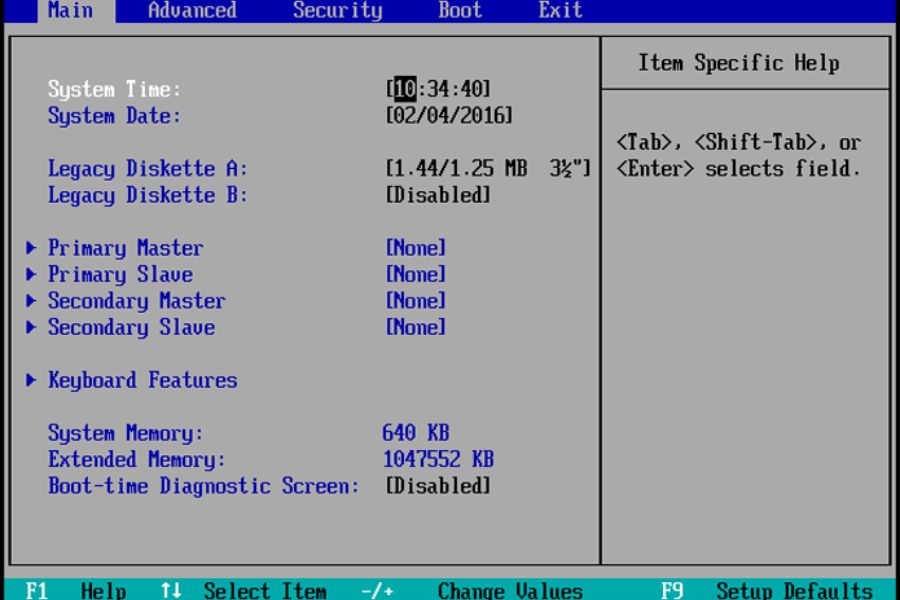
BIOS and CPU settings play a critical role in determining the stability and performance of your PC, including its behavior during gaming sessions. Incorrect or unstable settings in the BIOS or CPU can lead to system crashes, restarts, and other issues that may disrupt your gaming experience.
Significance of BIOS and CPU Settings
- CPU Performance: BIOS settings allow you to control various aspects of your CPU’s performance, including clock speed, core voltage, and power management. Properly configuring these settings can enhance your CPU’s performance and gaming capabilities.
- Overclocking: Some users may attempt to overclock their CPU to achieve higher performance. However, if not done correctly, overclocking can lead to instability and cause system restarts during gaming.
- System Stability: BIOS settings also impact overall system stability. Incorrect settings or conflicts between different settings can lead to system instability, crashes, and unexpected restarts.
Steps for Optimizing BIOS and CPU Settings
- Access BIOS: To access the BIOS (Basic Input/Output System), restart your PC and press the designated key during the boot process. The key to access the BIOS may vary depending on your motherboard manufacturer (e.g., Del, F2, F12, Esc). Check your motherboard manual or the manufacturer’s website for the specific key.
- Load Default Settings: Before making any changes, it’s a good practice to load default BIOS settings (usually found under “Load Optimized Defaults” or similar). This ensures that you start with a clean slate and avoid any potential conflicts caused by previous settings.
- Save and Exit: After making changes to the BIOS settings, save your changes and exit the BIOS. Your PC will restart, and the new settings will take effect.
Remember that incorrect BIOS settings can potentially cause damage to your hardware, so approach any adjustments with caution. If you are unsure about specific settings, it’s best to seek guidance from experienced users or consult your motherboard’s manual. With proper BIOS and CPU settings, you can enjoy a stable and smooth gaming experience on your PC.
Storage Drive Maintenance
Storage drive maintenance is crucial for ensuring the reliability, performance, and longevity of your PC’s storage devices, including hard disk drives (HDDs) and solid-state drives (SSDs). Regular maintenance can help prevent data corruption, improve read and write speeds, and avoid potential storage-related issues that may lead to unexpected PC restarts or slowdowns during gaming.
Importance of Storage Drive Maintenance
- Data Integrity: Regular maintenance helps to identify and correct file system errors, bad sectors, and other issues that could compromise data integrity on your storage drives.
- Performance Optimization: Over time, storage drives can become fragmented, affecting read and write speeds. Regular maintenance, such as defragmentation (for HDDs) or TRIM (for SSDs), can optimize performance.
- Preventing Drive Failure: Timely maintenance allows you to identify early signs of drive failure, reducing the risk of sudden data loss and unexpected restarts due to drive-related issues.
Steps for Storage Drive Maintenance
- Regular Backups: Before performing any maintenance, it’s essential to create regular backups of your important data. In the event of a drive failure or data corruption, having a backup ensures you can recover your files.
- Check Disk (CHKDSK): For HDDs, use the built-in CHKDSK utility (Check Disk) in Windows to scan and repair file system errors and bad sectors. To run CHKDSK, open File Explorer and right-click on the drive you want to check. Go to “Properties” > “Tools” > “Error-checking.” Click “Check” to start the scan.
- TRIM (for SSDs): For SSDs, ensure that TRIM is enabled. TRIM helps maintain performance and longevity by allowing the SSD to efficiently manage unused storage space. TRIM is typically enabled by default on modern systems.
- Defragmentation (for HDDs): If you have an HDD, consider running periodic defragmentation to optimize file placement and improve read and write speeds. Windows usually schedules defragmentation automatically, but you can manually initiate it as well.
- Disk Cleanup: Use the built-in Disk Cleanup utility in Windows to remove temporary files, system cache, and unnecessary files that may take up valuable storage space.
- Update Firmware (for SSDs): For SSDs, check the manufacturer’s website for firmware updates. Firmware updates can address performance issues and improve compatibility with the operating system.
- Avoid Overfilling Drives: Leaving some free space on your storage drives helps maintain performance and prolongs the lifespan of the drive. Avoid filling the drive to its maximum capacity.
Regularly checking for errors, running defragmentation (for HDDs), enabling TRIM (for SSDs), and keeping your drives clean and free from excessive data can help prevent data corruption, improve read and write speeds, and reduce the risk of drive-related issues leading to unexpected PC restarts or slowdowns during gaming.
PC Restarts While Gaming; FAQs
Why does my PC restart while gaming?
There are several possible reasons for your PC to restart while gaming, including overheating, insufficient power supply, outdated drivers, faulty RAM, or other hardware issues.
Should I clean the dust inside my PC to prevent restarts?
Yes, cleaning the dust inside your PC is crucial for maintaining proper airflow and preventing overheating. Dust accumulation can lead to higher temperatures, which may cause your PC to restart during gaming.
Can overclocking cause PC restarts during gaming?
Yes, overclocking can lead to instability if not done correctly or if the cooling solution is insufficient to handle the increased heat. If you’ve overclocked your CPU or GPU, try reverting to default settings and test if the restarts persist.
How often should I update my graphics card drivers?
It’s a good practice to check for graphics card driver updates regularly, especially before installing new games.
The Verdict
Experiencing unexpected PC restarts during gaming can be a frustrating ordeal for any gamer. However, with a systematic approach to troubleshooting and a solid understanding of the common causes of such issues, most problems can be diagnosed and fixed. By following the step-by-step methods provided in this guide, you can ensure a stable and enjoyable gaming experience on your PC.
Always exercise caution when dealing with hardware-related problems and be prepared to seek professional help when necessary. With persistence and determination, you can overcome PC restarts and fully immerse yourself in the captivating world of gaming on your PC.


